Back to section: Project administration
You can configure the following lists for the WF470 board:
Additional information on WF470 lists is provided under WF470 project files as well as in the Planning Guide for WF470, Section 1.3.
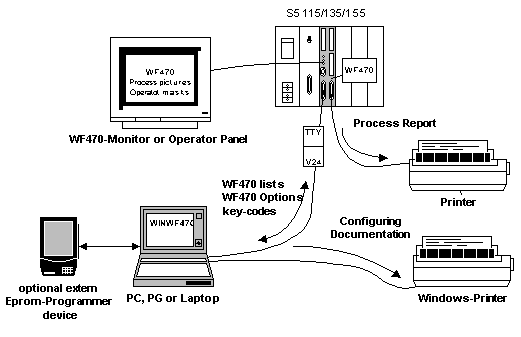
An overview of the devices/equipment which you require to configure WF470 using WF470WIN is shown in the subsequent diagram. The printer and Eprom programmer are optional.
You will find additional information on the equipment arrangement in the Planning Guide for WF470, Section 1.3.

Use the connecting cable PG 7xx to WF470 (5m): 6FM1 490-1FB00
The interface X6 of the WF470 is a TTY interface. If you use WF470Win on a PC, which only has an RS232 interface (generally, only the PGs are equipped with a TTY interface), then you will require a TTY/RS232 converter. It is practical if you use the existing S5 converter, if you connect this to the WF470 as follows using an adapter:
The S5 converter (20mA/V24) 6ES5 734-1BD20 is inserted in the PC.
The adapter between this converter and the WF470 can be made corresponding to the following diagram. The 24 V connection (P 24 M) is required.
|
X6 on the WF470 |
X7 on the WF470 |
To the adapter cable |
|
9-pin Submin D socket |
25-pin Submin D socket |
15-pin Submin D socket |
|
Screw locking |
Screw locking |
Mushroom head |
|
1 |
21 |
|
|
8 |
|
14 |
|
|
12 -10 |
|
|
|
16 -13 |
|
|
|
|
|
|
|
19 |
7 |
|
|
7 |
12 |
|
|
14 |
2 |
|
|
|
|
|
|
Enclosure/screen |
Enclosure/screen |
The parameterization dialog boxes include the following main elements:
It is especially the combination boxes and radio buttons which make it easier for you in comparison to CP/M / MSDOS configuring, as possible values are displayed in plain text. Thus, the dialog boxes are (hopefully) essentially intuitive. The following sections often restrict themselves to information about special features and background information in the Planning Guide for WF470.
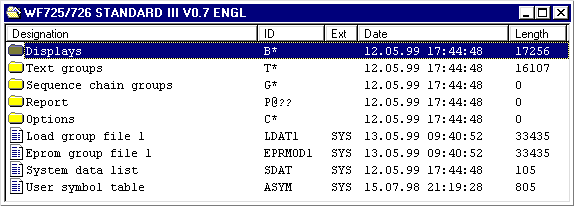
After opening a WF470 project or creating a new project, you enter the project list of contents.

From here, by selecting an entry and selecting the menu item File/Open you can branch to the individual lists of contents.
You can open the list of contents or the list by also double-clicking on the entry.
Directories and individual lists are located in the List of contents, project, which can be identified from the various icons.
The directory entries for screen lists, text groups, sequence chain groups, reports and options are always available. If the specified length = 0, there is no entry. Otherwise, the complete length of the lists contained in it is displayed.
From these lists, which are as a maximum, only available once for each project, the system data list is always available. This represents the WF470 project. The user symbol table and standard text list are only available if they have been set-up.
The group files (load group file, Eprom group file) are automatically set-up, as soon as you include the lists in a group directory (refer to Inserting lists in group directories ). The group files are not loaded on the board.
The Operator control structure, list of contents, project provides you with an overview of how the list of contents, project, can be handled.
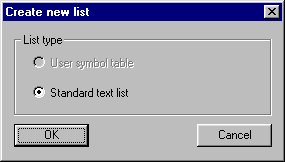
Select the menu item File/New, if you wish to set-up one of the two lists.
The "Set-up new list" dialog box is then opened:

Select which of the two new lists you wish to set-up and then press the "OK" button. The new list is generated and saved in the List of contents, project.
You can then edit the list by selecting the entry followed by the menu item File/Open.
To the next section: Configuring system data